


Can I just say that I am proud of this girl (*points to self*) for completing her very first sewing project EVER! May not be a huge deal for you but it is for me, especially as someone who is a creative and has the awful habit of starting something and not seeing it through to the end. To make it extra special, this was a completely hand-sewn project. YES – I hand-sewed this, meaning there wasn’t any utilization of a sewing machine of any kind. At. All.
So here is how this came to be….
As I mentioned in my previous post, I happened to be perusing YouTube for creative inspiration and came across a DIY Philip Lim clutch video made by a YouTuber named Evelina. The tutorial seemed simple enough and if the simplicity of the instructions weren’t motivation enough, she hand-sewed throughout the tutorial to prove those of us without a machine that it could be done. I was a bit intimidated at first since I never really had much practice with hand-sewing other than the occasional loose buttons, but it was a creative challenge I was ready to take on.
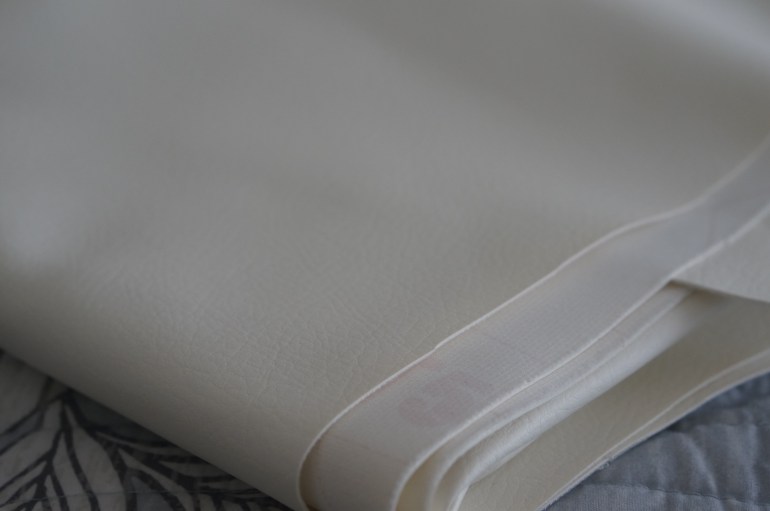
I headed over to my nearest Jo-Ann Fabrics and bought all of my materials including this beautiful cream vinyl fabric, an 12″ zipper and colorful quarter fabrics for the lining of my bag. I also went to the nearest Walmart to pick up this flexible rotary cutting mat and came back home to get to work.

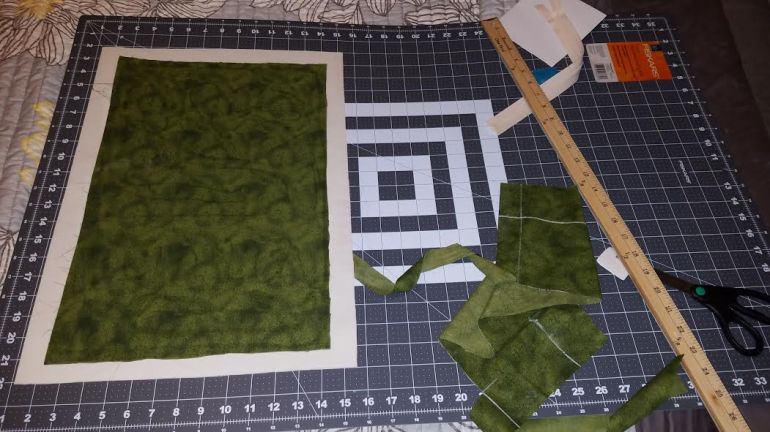

The measurements I used to cut out the vinyl were 13.5″ x 9.5″ (roughly). I wanted a clutch that was a bit oversized because I tend to pack a lot in a my clutches (working on breaking that habit), without being too overwhelming. This project took me a little under a week to complete because I hand-sewed pretty slow and had limited time in the evening to work on it. At times, it almost felt like it would never be completed at the rate that I was sewing and the amount of times I had to undo wonky looking stitches but I was VERY pleased with the way it turned out.
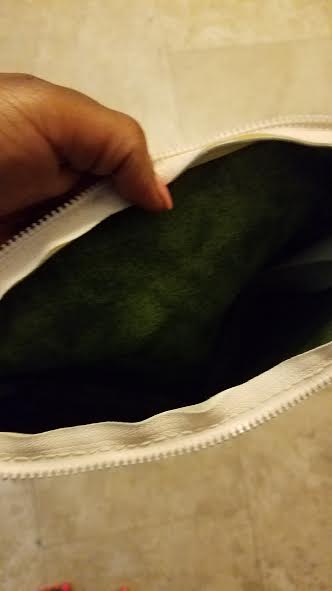
I loved how when I open it I can see this surprise of a forest green color pop out.
I debated on whether or not I would decorate my bag as Evelina did in her tutorial but I already started wearing the bag out and was enjoying it as is. However, I did discover how to make my own puff ball key chain (post on how I did that coming soon) and attached it to the zipper to add a little “wow” factor.
Future Improvements
I definitely have to work on installing zippers. The end of the zipper sometimes gets stuck in this little crevice between the end of the zipper and the top corner of the bag, making it a bit tricky to zip the bag shut. I also want to find a cleaner way to sew the edges of the bag so that the inside won’t have raw edges exposed even if I am not using a serger. I tried to used fabric glue to adhere them against the bag but that didn’t work out all too well. Lastly, I want to try sewing in the lining next time rather than gluing it onto the vinyl as it was done in the tutorial. I know it made the project easier, especially since it was my first time, but I also want to get in the habit of making things with quality in mind so that I can enjoy them longer. I have a few more quarter fabrics and plenty of vinyl material so I will definitely revisit this project again and provide an update in the future.

All in all, I enjoyed myself while making this clutch and it was so cool to see everything come together over time. I sent tons of pics of the process and outcome to friends and family and they were pleasantly surprised that I did it myself and sewed it by hand. It was just the motivation I needed to keep going.
Until next time loves!
Love,
Christine
